It's important to treat the surface of components made from metal to stop them changing colour and becoming damaged. Aluminium will oxidise, turning the surface grey rather than shiny; steel will rust; and copper will also oxidise and turn turquoise in colour.
Before you get started here are some things you'll need depending on the finish you want to achieve:
Some lacquer
Various grades of emery cloth and wire wool
Red oxide
Primer and paint
Plastic powder
And some hotwork gloves, apron, goggles and a dust mask.
Copper and aluminium are usually lacquered to prevent their surfaces oxidising and to preserve their aesthetics.
Steel can be lacquered too, but you can also get some really great finishes using other techniques.
Always start by removing any oxidisation or scale from the surface of the steel. You might need to use a grinder for this, but a combination of emery cloth and wire wool should prepare most surfaces ready for finishing.
Before applying any finishes, always make sure the surface is dry and free from oil or moisture.
Painting steel works well and you can choose whatever colour you want for your finish.
Begin by painting the metal with red oxide paint to prevent it rusting.
Once the surface is dry, you can apply a primer or go straight to painting. You can use brushes or aerosol sprays. Just be sure to use your mask for those.
Another option is to apply a plastic coating to your steel. To do this, you'll need to melt a plastic powder onto the surface of the steel.
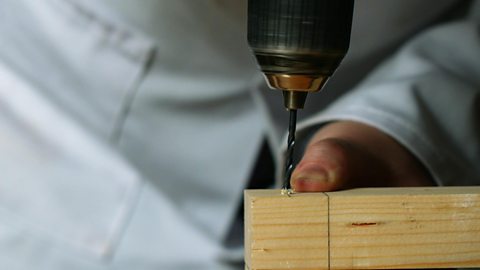
It's important that you don't touch the plastic powder or the surface of the metal throughout this process, so you'll need to drill a hole in your component so you can hang it on a wire hook.
One option is to heat the metal component in an oven first. The oven should be set to 160 degrees centigrade and your metal component will need to stay in for five to ten minutes.
Once the steel is up to temperature, leave it in for a few extra minutes to ensure that its heated evenly with no cooler spots.
Now use your hook to remove it from the oven and lower it into a fluidised bath. This allows the plastic powder to evenly coat the surface of the steel.
Now you can remove your component and hang it to cool.
There are plenty of options to choose from with metal finishes, so you should decide which is best for your metal item by thinking about what you want to use it for when it's finished.
Video summary
This short film explains the most common and accessible ways to give metal components a polished, professional finish.
It's important to treat the surface of components made from metal to stop them changing colour and becoming damaged.
Teacher Notes
Points for discussion
- Why do metals need to be clean, dry and free from rust and oil before applying a finish?
- This film uses polyester plastic as a coating for metal. Can you think why you might use a different plastic for a different component?
- If applying spray paint as a finish, why would you build up the final paint finish in repeated thin layers?
- Why do you need to use red oxide paint on ferrous metals?
- Why would you use a primer?
- If you wanted to paint a piece of wood, would any of these skills be transferable?
Suggested activities
- These techniques can be used on a huge range of metal-based components in KS3 projects and should be selected according to best use in KS4 RMT, product design, engineering and even graphic products projects.
- Discuss the appropriate level of finish for a garden tool project.
- Research and try oil quenching and/or tempering to provide a classy matt black finish to a steel multi tool blade.
Suitable for teaching design and technology (D&T) at KS3/KS4 in England, Wales and Northern Ireland, and 3rd/4th levels in Scotland.
Screwing components together. video
This short film explains how to use screws, nuts and bolts to fix components together.
Marking and cutting a halving joint. video
This short film explains the process of creating a halving joint, which is used to fix together two pieces of wood.
Laminating wood. video
This short film explains the process of laminating thin, flexible layers of wood to form a stiff, usable shape.